
How is it Monday ALREADY? It feels like it was 4:00pm Friday like… 26 seconds ago.
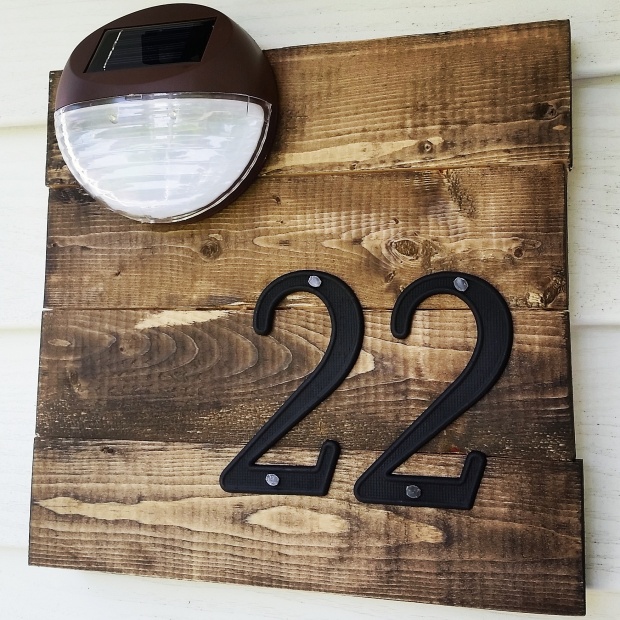
Anywho, this weekend I made an address number ‘plaque’ that I’m going to share with you! It was super easy and looks great. I’m all about adding curb appeal these days.
The idea came from Shanty-2-Chic, DIY Address Number Wall Planter, however I modified it a lot compared to their tutorial, but the idea started there… so they deserve some credit! These girls are AWESOME! They have a ton of free tutorials and so many ideas on their website, if you haven’t checked them out yet… you need to go now.
Or wait, go in about 2 minutes after you read this post.
If you have any scrap wood and stain hanging around this project will be almost free for you….#winning!!
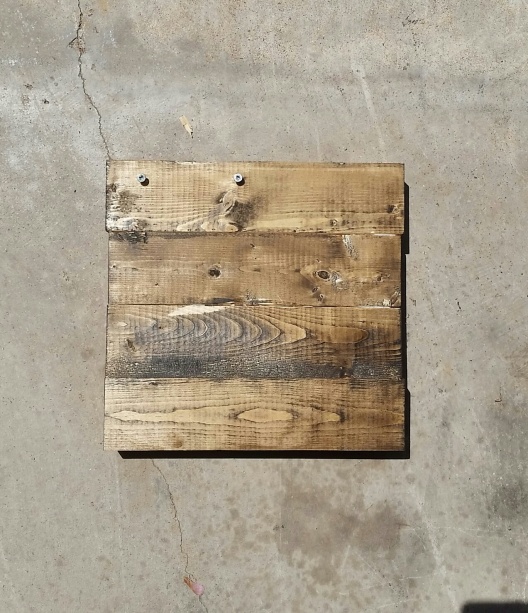
Okay, so start by cutting your wood to the desired width of your address plaque.
I was lazy and didn’t cut mine… it was just made from scraps left over and they don’t perfectly match up but hey, that just makes it look more “rustic”. I believe I used 1×3, so it’s light weight. You can use whatever you have hanging around!
Next, I used Liquid Nails (a MUST have for any DIYer) between the slats of wood. After they dried I added mending plates to the back of the wood (also, if you haven’t used these you must try them, so easy!).


Once you have your wood mended together you’re ready for stain! I used a mix of Minwax ‘Jacobean’ and ‘Classic Grey’, I only let it sit for about a minute and wiped it right off.
Jacobean is pretty dark, and since I spray painted my existing house numbers black I knew I didn’t want the wood to be very dark.
I thought it would be neat to add a solar light to my address plaque so it would be lit up at night (without using any energy!) and it gives a nice soft glow to our front door too.
Anyone else do any exterior projects this weekend?
I’d love to hear about them!
Pamela

Very cute:)
LikeLike